Arroz Con Pollo

Hope all of you had a wonderful Christmas, filled with love and joy!  I know I did :]  One of my very favorite gifts was the Cook's Illustrated cookbook.  


Its HUGE. Full of 2,000 recipes.  And the best part?  It has been a process in the making for 20 years because they tested all of the recipes, making them virtually fool-proof and loaded with flavor.  That's my kind of cook book.  So, if you like to cook too, I strongly recommend this one. I received this gift Sunday night, I had to use it for dinner on Monday.

While on our honeymoon in Costa Rica, meal time was pretty predictable.  It didn't matter whether is was breakfast, lunch, or dinner, my husband almost always ordered arroz con pollo.  I don't blame him, because this typical Costa Rican dish is bomb.  I almost jumped for joy when I saw this recipe in my new cook book.  And Matt was pretty excited, too. 

Ingredients:
6 medium cloves garlic minced or chopped 
Table salt
1/2 teaspoon dried oregano
1 tablespoon distilled white vinegar plus 2 additional teaspoons
Ground black pepper
bone-in, skin-on chicken thighs (3 1/2 to 4 pounds), trimmed (I used a bit less)
2 tablespoons olive oil
1 medium onion, chopped fine
1 small green bell pepper, stemmed, seeded, and chopped fine 
1/4 teaspoon hot red pepper flakes
1/4 cup minced fresh cilantro leaves
1 can (8 ounces) tomato sauce
1 3/4 cups low-sodium chicken broth
3/4 cup water
3 cups long-grain rice
1/2 cup green olives (manzanilla), pitted and chopped
1 tablespoon capers
1/2 cup jarred pimentos, sliced

Directions:
Adjust oven rack to middle position and heat oven to 350 degrees. 
In a medium bowl, add garlic, 1 teaspoon salt, oregano, 1 tablespoon vinegar, and 1/2 teaspoon black pepper; stir to combine. 


Place chicken in bowl with marinade. Coat chicken pieces evenly with marinade; set aside for 15 minutes.

Heat 1 tablespoon oil in Dutch oven over medium heat until shimmering. Add onion, green pepper, and pepper flakes; cook, stirring occasionally, until vegetables begin to soften, 4 to 8 minutes. 

Add 2 tablespoons cilantro; stir to combine. Push vegetables to sides of pot and increase heat to medium-high. Add chicken to clearing in center of pot, skin side down, in even layer. Cook, without moving chicken, until outer layer of meat becomes opaque, 2 to 4 minutes. (If chicken begins to brown, reduce heat to medium). 

Using tongs, flip chicken and cook on second side until opaque, 2 to 4 minutes more. 


Add tomato sauce, broth, and water; stir to combine. Bring to simmer; cover, reduce heat to medium-low, and simmer for 20 minutes.


Add rice, olives, capers, and 3/4 teaspoon salt; stir well. Bring to simmer, cover, and place pot in oven. After 10 minutes, remove pot from oven and stir chicken and rice once from bottom up. Return pot to oven. After another 10 minutes, stir once more, adding 1/3 cup water. Cover and return pot to oven; cook until rice has absorbed all liquid and is tender but still holds its shape and temperature of chicken registers 175 degrees on instant-read thermometer, about 10 minutes longer

Using tongs, remove chicken from pot; replace lid and set pot aside. Remove and discard chicken skin; using 2 spoons, pull meat off bones into large chunks. Using fingers, remove remaining fat or dark veins from chicken pieces. 

Place chicken in large bowl and toss with remaining tablespoon olive oil, remaining 2 teaspoons vinegar, remaining 2 tablespoons cilantro, and pimentos; season with salt and pepper to taste. Place chicken on top of rice, cover, and let stand until warmed through, about 5 minutes. 


I love cilantro, so I added some extra on top.


This was so good, and Matt loved it, too :]  I was a little hesitant about a few of the ingredients, but it turned out great! Next time, I would do the recommended amount of chicken (3 1/2 - 4lbs) because I did about half that.  It makes a lot.  Good news for us, we have lots of left overs!

<3 Saleena
Continue Reading...

DIY: Pom Pom Garland

Here are a few easy steps to make your very own pom pom garland!

Materials:
Fork
yarn
scissors 
needle


Directions:

Step One:  Wrap yarn around fork and cut yarn.  The amount of times you do this will depend on (1) the thickness of your yarn and (2) how big you want your pom pom to be.  With this particular yarn, I wrapped it around the fork 35-40 times.  With a different yarn (which is pictured below), I wrapped it around the fork about 60-65 times for the same size.  

 Step Two:  cut a piece of string about 8in in length and fold in half.

 Step Three:  Pull folded string through the two middle prongs. 

Step Four: Wrap string around so both ends are on one side of the fork.  Tie the string once to hold yarn together, then remove fork and tie once more to make a secure knot. 

Step Five: Tie the string once to hold yarn together, then remove fork and tie once more to make a secure knot. 

Step Six:  Using scissors, cut looped yarn on one side of the knot so it becomes frayed.

 Step Seven:  Cut looped yarn on the other side of the knot. 

Step Eight: Trim your pom pom into a nice ball

 Step Nine: Repeat steps 1- 8 until you have reached the desired amount of pom poms.  (I made 48 of each kind) 

Step Ten: Using needle and yarn, string poms in alternating colors.  You can have them right next to one another, like so...

Or you can leave an inch or two between each one. 

Step Eleven: Put it on the tree :]

Even though this is time consuming, it doesn't take much thought once you get the hang of it.  I often made the poms while watching TV or a movie with the hubby.  

<3 Saleena 
Continue Reading...

Almond Panko & Sesame Crusted Chicken with Honey Mustard Dipping Sauce

I love love love this recipe.  And so does everyone else I've made it for. The chicken is juicy with a crunchy crust that everyone loves. The dipping sauce is delicious and I end up saving whats left of it to put on other things.

Ingredients:
1/2 cup yellow or dijon mustard
1/2 cup honey
About 3 tablespoons finely chopped fresh chives
1 tablespoon hot sauce
2 eggs
1 1/2 pounds chicken breast tenders
Salt and pepper
1/2 cup slivered, sliced or blanched whole almonds
1 cup panko or plain breadcrumbs
1/4 cup sesame seeds
Vegetable oil, for frying
Directions:
In a bowl, combine the mustard, honey, chives and hot sauce.


Separate out half of the sauce and reserve. Beat the eggs into the remaining sauce. 

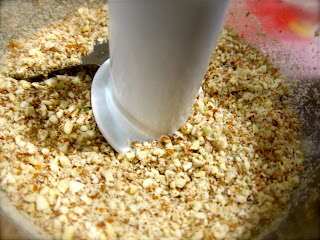
Using a food processor, grind the nuts. 


Combine with the panko and sesame seeds. 


In a large skillet, heat a layer of oil over medium-high heat. Coat the chicken tenders with the egg sauce and then the nut-breadcrumb mixture and fry, turning, until deep golden.


Serve with the honey mustard sauce, which is so delicious.
This dish is one of my favorites to make because it is very simple and the flavor is great.  
I promise, you won't be disappointed :]

<3 Saleena 


Continue Reading...

DIY: Ruffled Christmas Tree Skirt

Finals are DONE! Whoohoo!  It's time for celebrating.  How to best celebrate freedom from studies? Crafting of course!  Christmas is right around the corner, and because it is our first Christmas together (meaning we have absolutely no decorations), I have a lot to get done! When I stumbled across this tree skirt on HGTV's website, I fell in love.  The best part?   IT'S NO SEW!  So anyone can do it.  :]


Materials:
4-1/2' x 4-1/2' piece of canvas
measuring tape
5 yards cream linen (Or whatever color you would like - even christmas patterned!)
sharp scissors
fray-blocking glue
3 1/3 yards ribbon
hot glue gun and hot glue sticks

Directions:
Using a tape measure, mark and cut a square of canvas that is approximately 4-1/2' x 4-1/2', then fold into quarters.


 Once into quarters, fold canvas over itself to form a triangle with the folded center at point. Cut base in a quarter circle.


 Cut a small quarter circle out of the point.

 Open the skirt until it's folded in half and cut along the radius on one side of the center hole only. This will provide slit in the fabric so the skirt can be placed under the tree. 


Apply no-fray glue along all raw edges and allow to dry. Tip: A canvas painter's drop cloth is an inexpensive material perfect for this project.

Using sharp scissors, cut linen fabric lengthwise into 2.5-3 inch-wide strips. A little tip?  If your flooring allows, use your grout line as a guide.  These strips don't have to be perfect.

Preheat hot glue gun. Apply a line of hot glue approximately 1 1/2 inches from outside edge of skirt. Create ruffles by pinching linen with fingers and pushing gathers down onto hot glue. 


 Continue this process around the entire skirt edge. 

 Start the next row approximately 1 1/2 inches above the previous row. 

Repeat this process until its all done!  Just be forewarned, this is a pretty time consuming project. But don't be discouraged, the result is well worth it!

Next, cut 10 pieces of ribbon into approximately 12-14 inch lengths. Use hot glue to attach ribbon to underside of tree skirt along slit created in canvas base. (For added strength, I stapled the ribbon first and then hot glued it to the canvas.  Be careful not to staple your ruffles! Because the bottoms of the ruffles are not glued down, you are able to staple underneath them). 

Evenly space five on one side of slit and five directly opposite.

Place skirt under tree and tie ribbons together in bows.

Isn't it gorgeous?  
I think so. :]

Posted on 

&
Craft & Tell
&
&
A Crafty Soiree
FeaturedAtSBLC Thrifty Thursday Week 53
&
freckled laundry
 
&


Happy ruffling! 

Saleena <3

Continue Reading...

Rosemary and Garlic Butter Rolls

These are my new favorite dinner rolls.  Seriously, they're good. I found this recipe here.  She has great step-by-step pictures if its your first time making rolls.


Ingredients:
2 1/4 tsp active dry yeast (one packet)
1 stick butter (soft)
1/4 cup warm water
1 cup milk
2 tbsp sugar
1 large egg
1 tsp salt
3 cups flour
1 rosemary sprig
2 garlic cloves
coarse sea salt (I used Kosher)


Directions:
Dump 2 1/4 tsp active dry yeast in a bowl and add 1/4 cup of warm water.  Stir and let the yeast sit there for 5 minutes. 


Mix 2/3 stick of butter with 1 cup of milk. In a separate container, lightly beat a large egg.  Pop the milk & butter mix in the microwave for a minute at full power. It doesn’t have to be hot, just warm. Transfer the yeast water to your mixer bowl. Add 2 tbsp sugar, 1 tsp salt, pour in the egg and add 1 cup of flour.


Now pour in the milk with butter. Mix until the flour is incorporated before adding another cup of flour. Repeat this process until all the flour is incorporated. As soon as the wet and dry ingredients are combined, turn off the mixer and let the dough rest for 5 minutes before starting the kneading process. (This is when I switch from using my paddle attachment to the dough hook.) Unless you’re doing this by hand, then you start kneading right away and only use extra flour if the dough starts sticking to your hands. The dough will look really sticky at first, but that will resolve itself during kneading as the gluten are developed.

Knead for 6 to 7 minutes, by the end of which the dough will have formed into a ball. If your dough looks impossibly sticky in the final few minutes, add a tbsp flour at a time.  But remember, it should still be sticky to the touch! (My dough always looked too sticky...I probably ended up adding about 4 extra Tbsp) Transfer the dough to a lightly oiled bowl, apply some oil to the top of the dough to prevent it from drying out. Cover with a towel and let it rise for about an hour, until it doubled in size. 


Lightly butter a baking tray.

Transfer the dough to a lightly floured cutting board (or clean granite counter top). It should be a really supple and slightly sticky dough.


Flatten it with your hand and using a sharp knife divide the dough into 12 pieces.


In stead of rolling the dough in your hand, you simply fold the sides to the bottom and shape them in the palm of your hand. Transfer them to the buttered baking tray but give them a little room to rise. Cover them with a towel and let them rise for an hour to an hour and a half. 


Until they doubled in size.


Break out the pestle and mortar.  In order to get the flavor inside the butter, you have to release some of the oils. Strip the rosemary sprig and add 2 garlic cloves. 


Now smash the whole thing, reallly bruise the rosemary. 


Add the remaining 1/3 stick of butter and lightly mix it. Leave it be for an hour or so, while the dough rises. 


Once dough is done rising, microwave the butter mixture. This will intensify the flavor and will make it easier to brush on top of the rolls. Give it 30 seconds at full power.


Brush it all over the dough and don’t be shy, they’re not called butter rolls for nothing! Be sure not to add too much of the rosemary...if it burns it won't taste very good. Last but not least, sprinkle a generous amount of coarse sea/kosher salt all over them.


Bake them in a preheated oven at 350F for 20 minutes. Until all puffy and golden brown.


I tripled this recipe for Thanksgiving.  Everyone seemed to love them.  I know I did!

Make these for Christmas!

The Crafty Nest

<3 Saleena 
Continue Reading...
Related Posts Plugin for WordPress, Blogger...

Followers

Follow Me!

As you may know, Google connect will not be on blogger for much longer, so PLEASE follow me through Linky Followers!